Man, can you believe how hot it is outside? You could literally fry an egg on the sidewalk. Then I remembered something I had seen on Pinterest. Crayons melted down into new shapes in ice cube trays. Now I'm sure you're thinking, why would this crazy lady turn on her oven when it is 39 degrees outside? Well, we didn't. We melted these in the Van?!? I know, crazy. I couldn't even begin to imagine how it felt for the poor dog that was rescued at lunch time today in someone's vehicle. What is wrong with people... they need they're head shaken. That's a whole different story I'll get into later ;) Sorry, the how to, right.
I'm sure if your house is anything like mine, you have tons of broken and worn down crayons. Have the kids track down as many as they can. I think we used about 30, but it doesn't reall matter.
Next, have them peel the wraper off. The kids started off helping really good, but grew tired of this quickly. Some seemed like the wrapper just fell off, and others seemed like they were glued on. Weird since we used all Crayola.
Next they broke them up into small pieces and put like colours together.
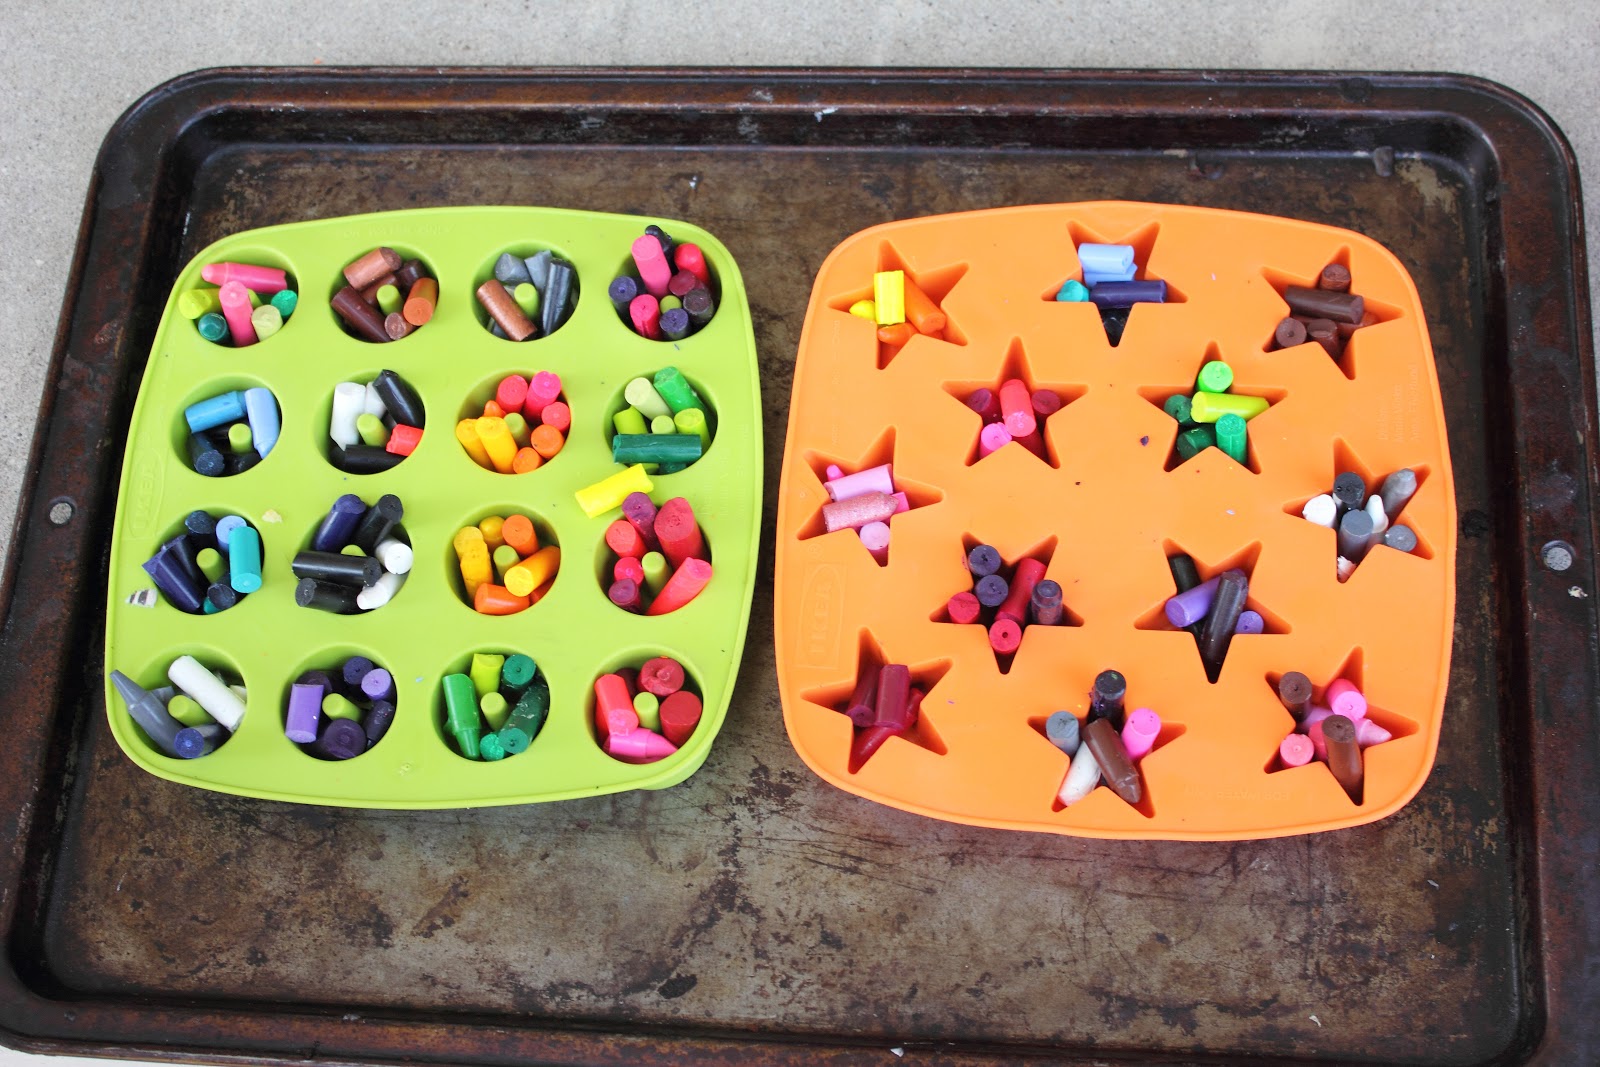
The kids decided which colours they wanted to put together into the moulds. The moulds are silicone and I got them at Ikea for $1.49 each.
We put them onto a cookie sheet and placed them on the dashboard in the van.
After about 30 minutes they were looking quite shiny.
Some of us are more patient then others, but after 60 minutes they were done.
I popped them into the freezer for a couple of minutes to make sure they were cool enough to take out.
EDIT: If your sun decides to hide in the clouds, you can melt them in a 200 degree oven in about 15 minutes.
Voila, brand new crayons to colour with.
We are using ours as a gift to the kids at the end of the school year.
Happy Crafting
With the economy as it is these days, and our income not increasing anytime soon, I wanted to see what was costing us the most each month and try to come up with a way to make that expense less. The big one was laundry. I did some research and came up with a few recipes for homemade laudry soap, and finally came up with my own version of the two. One recipe made a MASSIVE amount, and the other was a concentrated version. My husband didn't quite understand that he only needed a tbsp of the concentrated version, and I could see this method being used up a lot quicker :) so I decided to try out the larger version. I us a US 5 Gallon pail that we had laying around the house, but some other ideas for storage could be some old used laundry containers or even an empty water jug.
So here's what you need to buy...
1 bar Sunlight soap (I found this at my local Metro store), Fels Naptha soap (the more popular brand in the US) or whatever soap you can find
1 1/2 cup 20 Mule Team Borax (from Walmart) Canada and the US
1 1/2 cup Washing Soda *** not baking soda*** see link below for how to make it yourself
water
The first thing I realized was that washing soda is incredibly hard to find in Canada. If you make frequent trips to the states, then you can find it at Walmart, however I had no luck finding it here. I learned how to make my own washing soda HERE and HERE. Both these sites have great ideas for frugal tips and green living, (always a bonus).
I've made 2 batches of the 5 gallons since February, it lasts us about a month and a half. I know that 10 gallons might seem like a lot, but we do a couple loads of laundry every day, sometimes its the same load twice because we've forgotten about it and now it smells and we have to re-wash it ;) I've done the math and it works out to about $11 for the ingredients, but you don't use it all. A box of borax cost me $5 and I used maybe a 5th of the box. The sunlight bars was a 3 pack and was $5. And the baking soda I turned into washing soda was $1.73.The 5 gallon pail makes about 150 loads. Using 1/2 cup per load means each load only costs about 2 cents. Seriously, I am NEVER buying laundry soap again.
So the first step is to grate the entire bar of soap. I let the kids help me for this.
I use a large pot for this next step, but a dutch oven or large stew pot would work. Fill the pan about half way with warm water and place it on your stove over medium heat. Boil a full kettle of water, you will need it shortly. Add your grated soap, stirring until melted.
Add in 1 1/2 cups of washing soda and 1 1/2 cups of borax, stirring constantly until it is an even consistency.
Lower the heat to medium and let the soap sit and thicken. Try not too stir too much. Keep an eye on the mixture and lower heat if needed. YOU DO NOT WANT IT TO BOIL. Trust me :) If it begins to boil, lower the temperature, and remove from heat. Don't worry if this happens as the soap will still work and your stove will be VERY clean. After about 15 minutes your mixture should be about the consistency of honey and will be ready to mix with water.
Add the water that you boiled to your 5 gallon bucket first. I forgot this step the first time, so this is why I mention it :)
Next add your soap and stir well.
Continue to add cold water, stirring regularly, until the bucket is full. Your soap might get a bit foamy from adding the water, but won't affect the soap in the long run.
Leave the soap uncovered overnight to cure, then make sure to keep the lid on tight after that, as it will evaporate a bit if left open too long. (Just a side note, you might want to move your bucket out of the kitchen after you are done making this as your 6 year old might dump the ENTIRE PAIL onto the kitchen floor, down the hallway, and down the basement stairs) Good thing it was easy to make :)
There you have it. I have now made 3 batches of the soap and couldn't be happier. No one seems to notice the difference in my clothes except my wallet :)
Happy Crafting
This past weekend our family was invited to a very special little girls 4th birthday. Whenever possible I like to try to make a gift that is practical and fun for the recipient.
I was toying with the idea of a fort kit or play house or something, then came across a website with a tutorial for a Tee Pee. pinktoesandpowertools is a fantastic website and has so many great ideas. Her tutorial was so easy to follow, and was relatively quick for me to complete. Maybe I shouldn't have started it at 10:30pm the night before the party though :)
The pattern calls for 5 1/2 yds I bought 6, because I was making this for the first time, I figured everything would go wrong :) However, this tutorial is so fantastic I didn't encounter any problems. One thing, if you buy reversible fabric (same on both sides) you only need 3 yds of fabric. So lucky for my kids, I was able to cut out an entire 2nd set of patterns.
I did also make some ties to keep the doors open, and I used wooden dowels instead of the PVC pipe. That was only because my local Lowes didn't have enough PVC pipe. Only took me about 1 1/2 hours to complete. I think the next one will be even quicker.
Let me know if you make one, I'd love to see a picture!
Happy Crafting
Ginny